Se vuoi realizzare un portagioie fai da te, il metodo più semplice è partire da una robusta scatola di cartone o di legno, misurare i gioielli che vuoi riporre, creare una disposizione di base degli scomparti, aggiungere un rivestimento morbido come velluto o feltro e rifinire l'esterno con carta decorativa, stoffa, vernice o un tuo disegno. Per una versione semplice in cartone, ti serviranno solo cartone, un righello, una matita, un taglierino, delle forbici, della colla e della stoffa o della carta per la decorazione. Il segreto non è rendere la scatola complicata, ma assicurarsi che le dimensioni, gli scomparti, il coperchio e l'interno siano progettati in base ai gioielli che si intende effettivamente riporre.
Per un progetto personale, realizzare un portagioie a mano può essere sorprendentemente gratificante. Puoi scegliere tu stesso il colore, il materiale, la forma, la fodera e i piccoli dettagli. Ma se sei un marchio di gioielli che deve confezionare centinaia o migliaia di pezzi per i clienti, la questione cambia. A quel punto, non stai più semplicemente realizzando un portagioie. Stai progettando un pezzo di confezioni personalizzate per gioielli che deve avere un aspetto coerente, proteggere il prodotto, rappresentare il tuo marchio ed essere pratico da produrre.
Questa guida affronta entrambi gli aspetti della questione: come realizzare un semplice portagioie fai da te e cosa considerare quando la stessa idea deve trasformarsi in un packaging professionale per un'attività di gioielleria.
Non serve un laboratorio professionale per realizzare un portagioie semplice.
Per una versione semplice in carta o cartone, preparare:
Se preferisci una scatola di legno, avrai bisogno di strumenti aggiuntivi come una sega, carta vetrata, colla per legno, cerniere e, eventualmente, un trapano. I portagioie in legno possono essere più resistenti, ma richiedono anche più tempo e precisione.
Per la maggior parte delle persone che si cimentano in un progetto fai-da-te a casa, il cartone è un materiale facile da lavorare. Si può tagliare con strumenti relativamente semplici e sperimentare con diverse dimensioni prima di optare per il design definitivo. Un portagioie in cartone fatto a mano può anche essere rivestito con carta decorativa o tessuto per conferirgli un aspetto più rifinito.
Questa è la parte che è facile trascurare.
Non iniziare tagliando il cartone. Inizia dai gioielli.
Una scatola pensata per gli anelli è diversa da una pensata per le collane. Gli orecchini necessitano di piccoli fori o scomparti individuali, mentre i bracciali possono richiedere uno scomparto più ampio. Anche le collane lunghe hanno bisogno di spazio sufficiente per evitare che si aggroviglino.
Prendete i gioielli che volete conservare e misuratene le dimensioni approssimative. Quindi, disegnate su un foglio di carta la pianta interna della scatola.
Ad esempio, potresti creare:
Questo approccio rende la scatola finale molto più pratica.
Lo stesso principio è importante quando si progetta un scatola portagioie personalizzata per un'azienda. Invece di partire da un esterno accattivante e cercare di adattare il prodotto all'interno in un secondo momento, i progettisti di packaging devono solitamente considerare contemporaneamente le dimensioni dei gioielli, la struttura interna, la protezione del prodotto, la presentazione e i requisiti di spedizione.
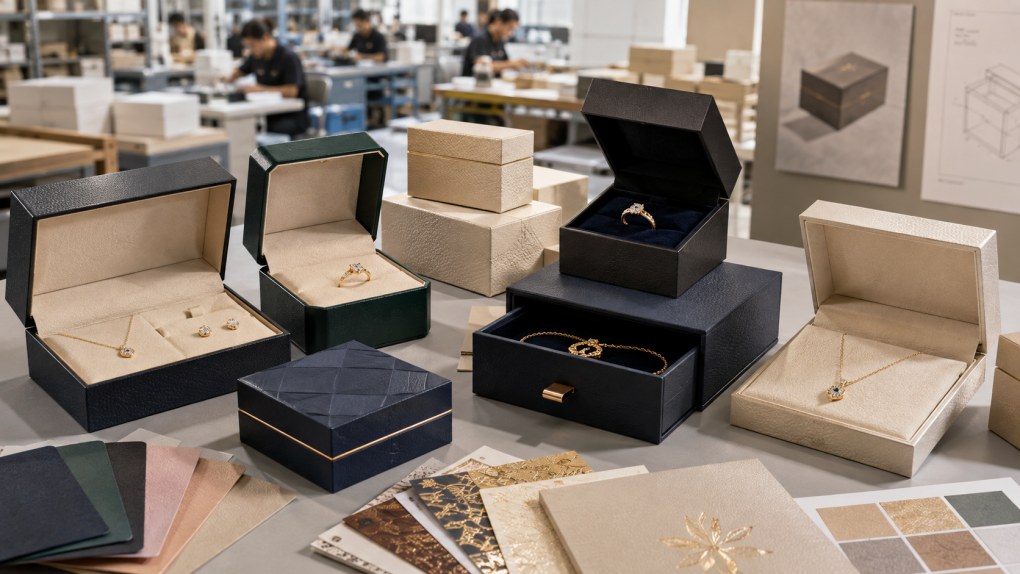
Una volta note le dimensioni approssimative, segnatele con cura sul cartone.
Un semplice portagioie può essere realizzato con una base e quattro pezzi laterali, seguiti da un coperchio separato. Se si desidera un risultato più pulito, si può anche creare la scatola da un unico foglio più grande con linee di piegatura pre-incise.
Misurare due volte prima di tagliare.
Sembra banale, ma fa una differenza notevole. Pochi millimetri di errore possono rendere gli angoli irregolari, impedire al coperchio di chiudersi correttamente o lasciare degli spazi vuoti lungo i bordi.
Se devi realizzare diverse scatole, crea prima un modello in cartone. Una volta che il modello funziona, usalo per riprodurre le stesse dimensioni.
Questa è una delle principali differenze tra un progetto amatoriale e un packaging commerciale. Una scatola fai-da-te deve avere un bell'aspetto solo una volta. Una soluzione di packaging professionale, invece, deve riprodurre le stesse dimensioni e la stessa finitura ripetutamente.
Applica la colla con cura lungo i bordi e unisci i lati.
Non usare troppa colla. La colla in eccesso può penetrare nel cartone o lasciare segni visibili sotto i materiali decorativi.
Tenete fermo ogni angolo finché l'adesivo non si sarà asciugato. Graffette o piccole pinze possono essere utili per mantenere la struttura in squadra durante l'asciugatura.
In questa fase, la scatola potrebbe non sembrare particolarmente accattivante.
È normale.
Il carattere visivo viene poi definito dal rivestimento, dagli inserti, dalle finiture e dai piccoli dettagli.
Per una semplice scatola fatta a mano, si può usare della carta decorativa. Per un risultato più raffinato, la stoffa o la carta con texture possono cambiarne completamente l'aspetto.
L'inserto è il punto in cui una semplice scatola inizia a trasformarsi in un utile portagioie.
Un inserto morbido protegge i gioielli dallo sfregamento contro la superficie dura e mantiene ogni pezzo nella sua posizione corretta.
Velluto e feltro sono materiali molto diffusi per i progetti fai-da-te perché sono relativamente facili da tagliare e applicare. Si possono creare piccoli cuscinetti per gli anelli, fessure strette per gli orecchini o scomparti separati per le collane.
Se stai facendo un portagioie personalizzato, questa è anche un'opportunità per far sì che gli interni rispecchino la persona o il marchio a cui sono destinati.
Per esempio:
Un portagioie minimalista potrebbe avere un rivestimento interno color avorio o beige.
Una scatola ispirata al lusso potrebbe essere realizzata in velluto nero intenso.
Una confezione regalo romantica potrebbe essere realizzata nei toni del rosa cipria o del crema caldo.
Un marchio di gioielli contemporaneo potrebbe preferire un inserto grigio neutro con un design geometrico pulito.
L'interno non deve essere complicato. Deve semplicemente far sì che i gioielli appaiano in ordine quando il coperchio è aperto.
Ora arriva la parte divertente.
È possibile rivestire l'esterno con carta decorativa, tessuto, materiale similpelle, superfici dipinte o carta stampata.
Per un progetto fai-da-te domestico, la carta per scrapbooking è un'opzione semplice. Per una finitura più raffinata, la carta testurizzata può fare una differenza sorprendentemente grande.
È possibile aggiungere anche:
La decorazione deve essere adeguata alla funzione della scatola.
Un cofanetto portagioie pensato come regalo di nozze può essere più delicato e decorativo. Un cofanetto per un marchio di gioielli contemporaneo solitamente beneficia di una tipografia più pulita, colori sobri e un'identità visiva più coerente.
È qui che nasce l'idea di scatole portagioie personalizzate Questo aspetto diventa particolarmente importante per le aziende. Invece di limitarsi a decorare una scatola esistente, un marchio può controllare la struttura, le dimensioni, la carta, i colori, la stampa, il trattamento del logo, l'inserto e la finitura della scatola.
Se la scatola è ad uso personale, si possono aggiungere le iniziali, una data, un breve messaggio o una piccola illustrazione.
Se si tratta di un'attività nel settore della gioielleria, il branding dovrebbe essere più mirato.
Il logo può essere stampato direttamente sulla confezione oppure impreziosito con tecniche come la stampa a caldo o la goffratura. Un logo discreto su una superficie di carta ruvida può spesso risultare più elegante di una grafica grande e complessa.
L'obiettivo non è quello di diffondere il marchio ovunque.
L'obiettivo è rendere la confezione riconoscibile al cliente.
Bene confezioni personalizzate per gioielli Dovrebbe sembrare parte integrante del prodotto, non un elemento aggiunto in un secondo momento.
SÌ.
Se state realizzando un semplice portagioie in casa, il cartone o il cartoncino rigido sono probabilmente i materiali più facili da utilizzare.
Esistono molti modi per realizzare un portagioie in cartone utilizzando tecniche di base come misurare, tagliare, piegare, incollare e rivestire. Una struttura in cartone può anche essere personalizzata con diversi inserti e carte esterne.
Il legno è tutta un'altra storia.
Un portagioie in legno può dare una sensazione di maggiore solidità, ma in genere richiede più strumenti, tagli precisi, levigatura, installazione di ferramenta e lavori di finitura. Alcuni progetti di falegnameria fai-da-te utilizzano cerniere, divisori, rivestimenti in feltro e diversi tipi di legno per creare un cofanetto portagioie più resistente.
Quindi il materiale migliore dipende dallo scopo.
Per un progetto creativo da realizzare nel fine settimana: il cartone è pratico.
Per un ricordo personale: il legno può essere una scelta azzeccata.
Per il confezionamento di gioielli destinati alla vendita al dettaglio: in genere, la soluzione più pratica è rappresentata da imballaggi in cartone o rigidi realizzati professionalmente.
È qui che il fai-da-te smette di avere molto senso.
Immaginate di tagliare, assemblare, rivestire, foderare, controllare e imballare a mano 5.000 scatole per gioielli.
Anche se la produzione di ogni scatola richiedesse solo pochi minuti, il lavoro diventerebbe rapidamente insostenibile. Ancor più importante, sarebbe difficile mantenere dimensioni, colori, stampa, posizionamento degli inserti e finitura uniformi.
Per un marchio di gioielli, l'approccio migliore è solitamente quello di trasformare il concetto "fai da te" in un design di packaging pronto per la produzione.
Tu puoi decidere:
È qui che si lavora con un produttore di scatole regalo personalizzate può far risparmiare molto tempo.
Anziché realizzare manualmente ogni scatola, si definisce la specifica dell'imballaggio una sola volta e la si fa riprodurre in modo coerente per tutti gli ordini.
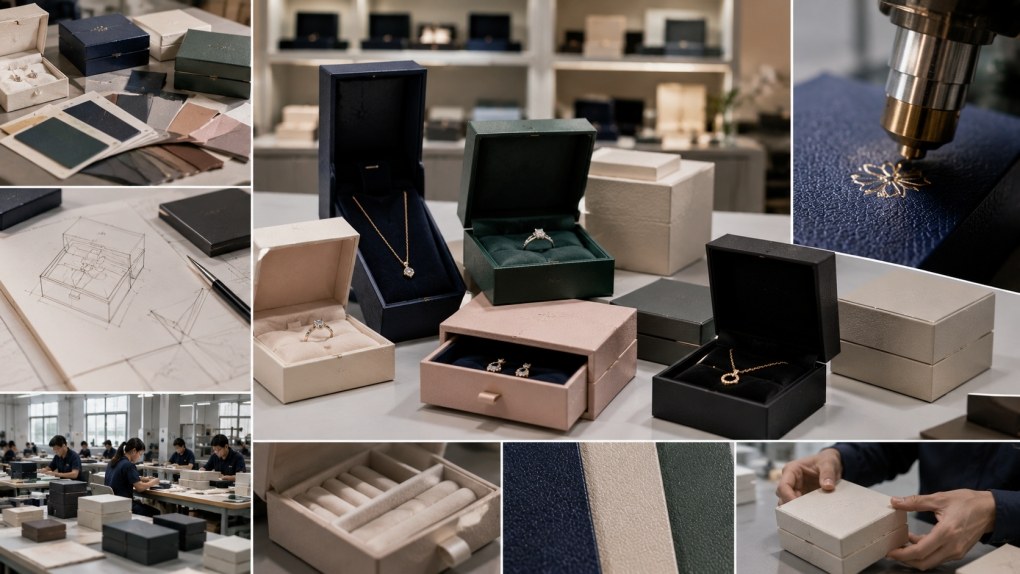
Non c'è niente di male nel creare il proprio portagioie.
In effetti, i progetti fai-da-te possono essere un modo utile per scoprire cosa si desidera realmente da un imballaggio.
Potresti renderti conto di aver bisogno di un inserto più profondo.
Potresti scoprire che la tua collana necessita di uno scomparto più lungo.
Potresti preferire una chiusura magnetica al posto del coperchio tradizionale.
Potresti scoprire che il velluto nero si abbina meglio ai tuoi gioielli rispetto alla gommapiuma bianca.
Queste piccole scoperte possono trasformarsi in specifiche preziose quando si passa alla produzione commerciale.
Per un marchio di gioielli, la confezione finale deve fare molto di più che semplicemente contenere il prodotto.
Deve resistere alla manipolazione e alla spedizione, presentare i gioielli in modo adeguato, contenere il prodotto in modo sicuro e comunicare il posizionamento del marchio.
È per questo cofanetti portagioie di lusso personalizzati Spesso ci si concentra sulla combinazione di struttura e finitura piuttosto che sulla sola decorazione.
Una scatola stampata in modo impeccabile con un inserto scadente rimane comunque un imballaggio di scarsa qualità.
Anche un inserto ben progettato all'interno di una scatola debole può creare problemi.
I design di packaging più efficaci prendono in considerazione l'intera esperienza, dall'esterno della scatola fino al momento in cui il cliente solleva il coperchio.
Quante possibilità di personalizzazione sono disponibili?
Più di quanto la maggior parte delle persone si aspetti.
Un fornitore professionale di imballaggi per gioielli è solitamente in grado di personalizzare la struttura, le dimensioni, i materiali, la stampa, la finitura, gli inserti e la chiusura in base alle esigenze del prodotto e del marchio.
Ad esempio, un marchio di gioielli potrebbe desiderare una piccola scatola rigida con un inserto in velluto nero e il logo in lamina d'oro.
Un altro potrebbe preferire una scatola magnetica bianca minimalista con inserto sagomato e una leggera goffratura.
Un terzo cliente potrebbe preferire una scatola a cassetto con carta testurizzata e un nastro per aprirla.
Tutti e tre sono in grado di comunicare personalità di marca completamente diverse, pur servendo allo stesso scopo fondamentale.
Questo è il vantaggio di scatole portagioie personalizzate: l'imballaggio può essere progettato attorno al prodotto anziché forzarlo in una scatola standard.
Quando conviene realizzare scatole fai-da-te e quando è meglio ordinare scatole personalizzate?
Se hai bisogno di una o due scatole per un progetto personale, il fai da te può essere un'ottima soluzione.
Se stai creando un prototipo, il fai-da-te può anche aiutarti a testare le dimensioni e la disposizione degli elementi prima di effettuare un ordine di produzione.
Ma se stai preparando il packaging per un negozio di gioielli online, una collezione al dettaglio, un ordine all'ingrosso, una linea di gioielli da sposa o il lancio di un nuovo prodotto, la produzione professionale è solitamente la scelta più sensata.
La decisione diventa ancora più chiara quando si ha bisogno di centinaia o migliaia di scatole identiche.
A quel punto, la coerenza diventa fondamentale.
È necessario che ogni scatola abbia le stesse dimensioni, lo stesso colore, la stessa posizione del logo, lo stesso inserto e lo stesso aspetto generale.
È difficile da ottenere manualmente, ma molto più semplice tramite un processo di produzione controllato.
Un portagioie fai-da-te è un buon punto di partenza perché ti costringe a pensare ai dettagli.
Quali dimensioni deve avere la scatola?
Dove dovrebbe essere posizionato l'anello?
Come va fissata la collana?
Cosa dovrebbe vedere il cliente quando apre il coperchio?
L'esterno dovrebbe trasmettere un'impressione di semplicità, eleganza, giocosità o lusso?
Queste domande sono altrettanto importanti quando si sviluppano imballaggi commerciali.
A AriaAiutiamo i marchi di gioielleria a trasformare queste idee in packaging pronti per la produzione. Dalla struttura della scatola e dalla selezione della carta alla stampa, alla stampa a caldo, alla goffratura, alle chiusure magnetiche e agli inserti personalizzati, il packaging può essere sviluppato attorno al gioiello anziché essere scelto da un catalogo standard.
Se hai già un'idea per il packaging, non è necessario avere un progetto definitivo prima di contattarci. Puoi iniziare con le dimensioni dei tuoi gioielli, foto di riferimento, schizzi o anche un semplice prototipo fai-da-te.
Aria può quindi contribuire a trasformare quell'idea in scatola portagioie personalizzata Imballaggi adatti al vostro marchio e alle vostre esigenze di produzione.
Per i marchi di gioielli che tengono alla presentazione dei propri prodotti, la confezione è parte integrante dell'esperienza del cliente.
E a volte, il miglior packaging professionale nasce da un'idea fai-da-te molto semplice.
Cerchi scatole portagioie personalizzate per il tuo marchio? Comunicaci le dimensioni della scatola, il tipo di gioielli, la quantità e lo stile che preferisci: ti aiuteremo a sviluppare una soluzione di packaging pratica per il tuo prossimo ordine.


Diritto d'autore © 2026 XIAMEN AIRETION TECHNOLOGY CO. LTD.. Tutti i diritti riservati .




 IPv6 network supported.